Studio Quality Rendering
A Studio Quality Rendering attempts to duplicate a photograph which would be made by a professional photographer in a studio. In the photo studio, lights would be placed carefully by the photographer of a stylist. Everything would be set up to bring out the best features of the subject. Studio Images a used in advertisements of client presentations. They are designed to sell or promote the product.
The more important factor in creating a good studio rendering is the proper use of lights and shadows. By placing lights deliberately you can show your product at its best. Many SketchUp Rendering products have defaults which make it easy to create a studio rendering.
Here is a sample of a dragon rendered in the Studio. High Dynamic, Studio lighting was provided using a HDRi Sky . The shadows were left intentionally, for effect.
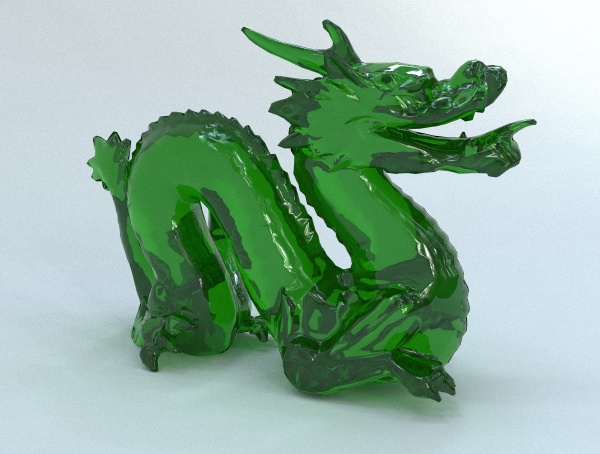
Rendering using Engine 4 with 2000 passes.
Contents
Lighting
IRender nXt provides a default High Dynamic or Studio lighting setting,
The Studio lighting setting mimics the lighting which might be found in a photographer's studio. It is most useful for rendering small to medium sized objects in isolation.
The primary lighting is provided by an high dynamic range image file (HDRi). The light from the HDRi has been artificially dimmed, to resemble the interior lighting levels of the studio. You can modify the HDRi settings and file on the HDRi Setup Tab . You can also add artificial lights to your scene using the Lights tab.
Common Lighting Mistakes
Too many lights
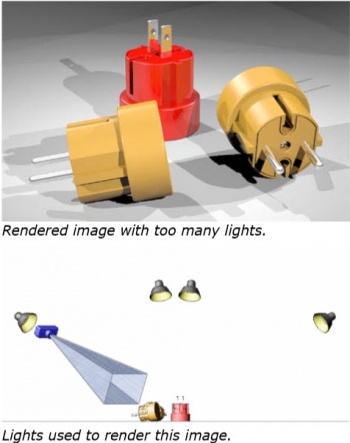
A problem with too many lights is too many shadows. The shadows compete with each other and compete with the product. The shadows compete with each other and compete with the product itself.
You will never see professional product images or advertisements with shadows like this.
Using a headlight
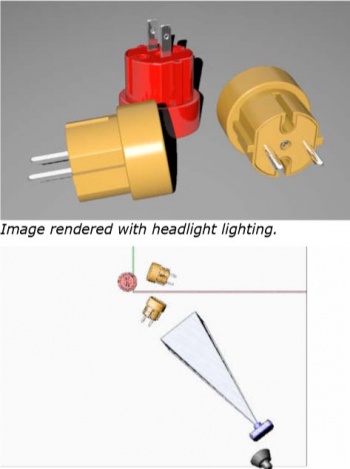
Another mistake is to place the lights near the camera. This creates an effect such as a flash image with your smart phone. The light near the camera creates thin shadows and lights the product only from the viewing angle.
This creates low contrast in the illuminated objects.
Both of these example demonstrate the importance of lighting in studio renderings. Proper lighting helps the viewer perceive the objects shape and three-dimensional form.
Setting
You can render your product in front of a neutral surface, or a neutral background.
You can also use special studio geometry to provide a background effect.
Studio Layout
You can create geometry to match the type of layout a proessional photographer would use for a studio photograph.
Setting this up can be time consuming, but you have a lot more control on the effects and, at the end, you can create a a "more profound effect" for your rendering.
Here is a typical layout used by massimo on the SketchUcation forum to create a rendering.
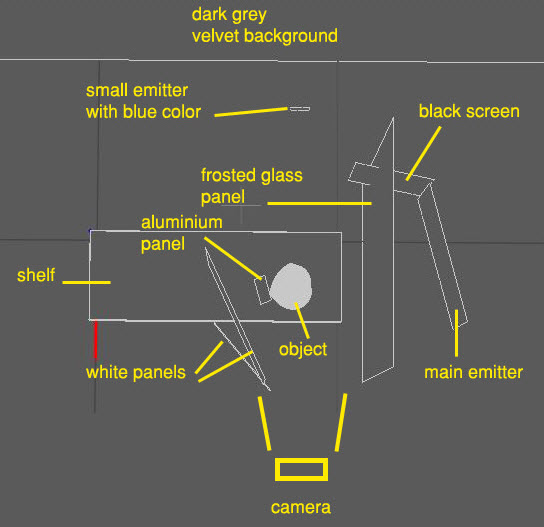
Model rendered by massimo using this studio layout

Studio Model

Basic Studio on 3D Warehouse
Here is a Studio for Rendering which was supplied by Solo as part of a Rendering Workshop on SketchUcation: Rendering Workshop - Studio - still life
The model for the Studio is available from the 3D Warehouse - Basic Studio for Renderings.
Although the studio looks small, it is actually very large.
Play around with this setting up your camera angles, then adding lighting as needed. Remembering that too many lights will give overlapping shadows which can ruin a studio setup.
Sample
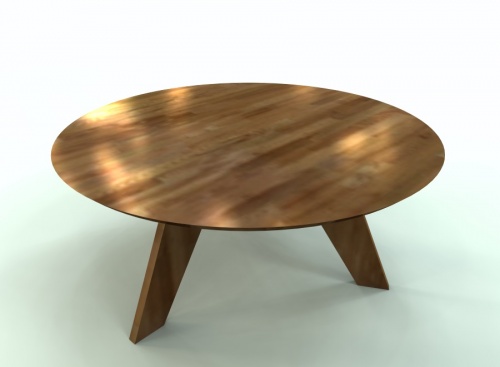
We have a client who is trying to produce Studio Quality renderings of furniture much like this. (This is a photograph.)
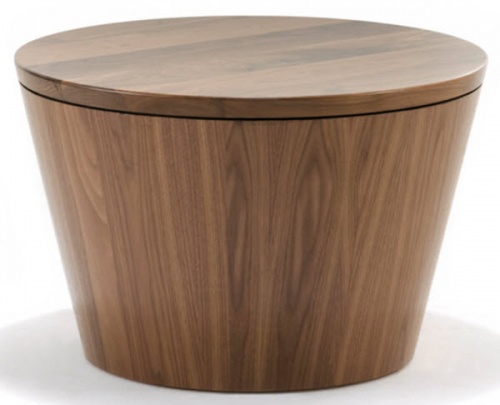
I pointed out that IRender nXt has Studio Rendering defaults that make renderings like this fairly easy.
He produced a quick rendering, and got this result.
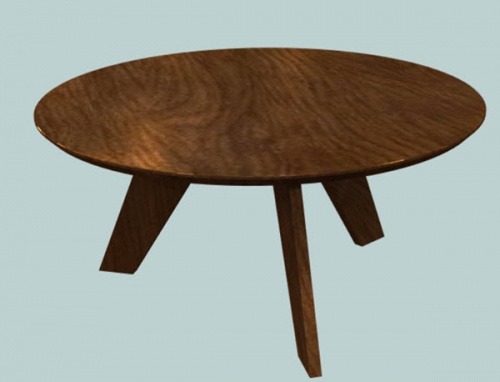
I pointed out that the absence if shadow in the floor made me think that the ground plane was not turned on, since the Studio Rendering defaults should automatically cast shadows.
He sent me his model, and I made two quick changes.
I chose the Studio Preset and I made sure that the ground plane was turned on, and sun and sky were turned off.
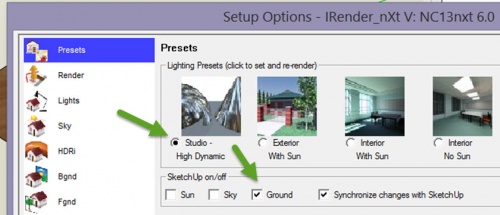
And I right-clicked in the table top and chose the default reflective material setting.

Then I created a quick rendering. (20 passes)
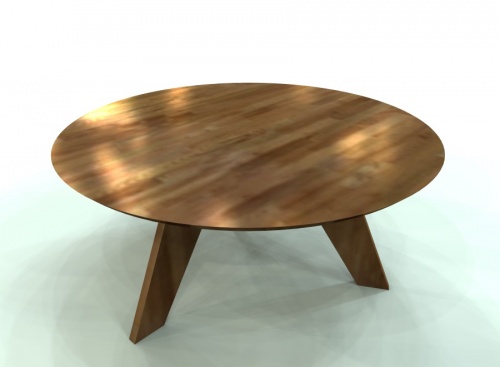
To smooth out the reflections and shadows, I then let the rendering continue for 200 passes.
(With IRender nXt, more and more passes just create a better rendering.)
We both realized that the rendering would look even better if he added bevels to the edges of the wood.