SketchUp Models - Add Lights Tutorial
Contents
Introduction
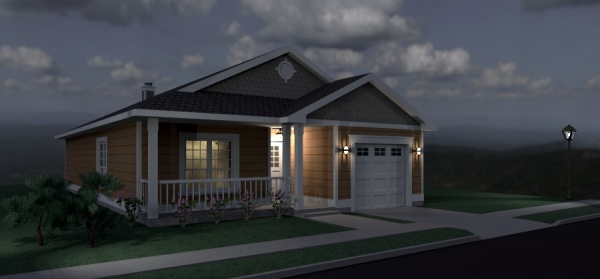
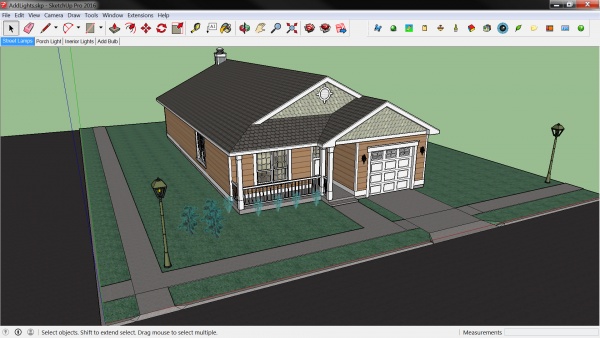
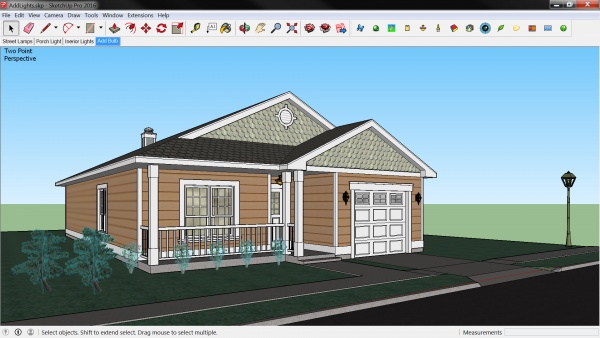
This tutorial is a guide to adding lights to SketchUp Models, for renderings to be created with IRender nXt by Render Plus Software, Inc. In this tutorial, add lights to this SketchUp model of a small house. Select light fixtures from the Render Ready Components dialog and add them to the model. Create a new fixture by adding a bulb (lamp) to components already in place in the model.
Open the Tutorial Model
The model for this tutorial is available here: this will be the warehouse link

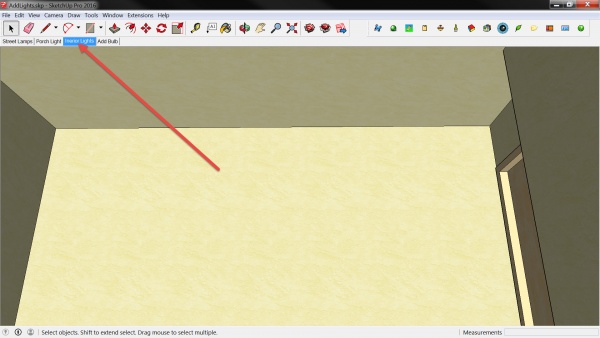
Street Lights
Select and place street lights.
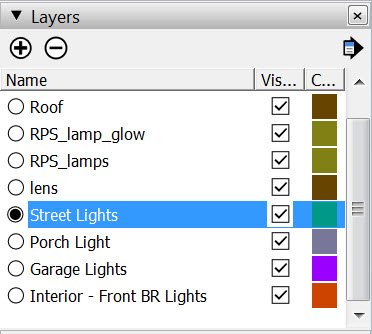
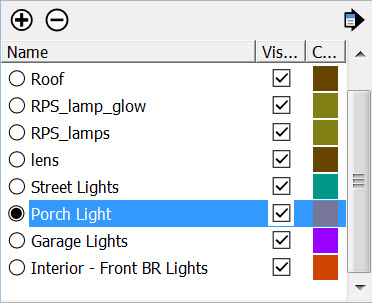
Layer Management
Select the Street Lights layer.
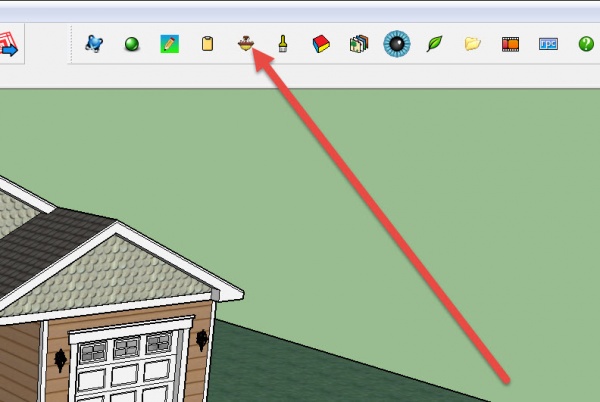
Render Ready Components
Click to open the dialog.
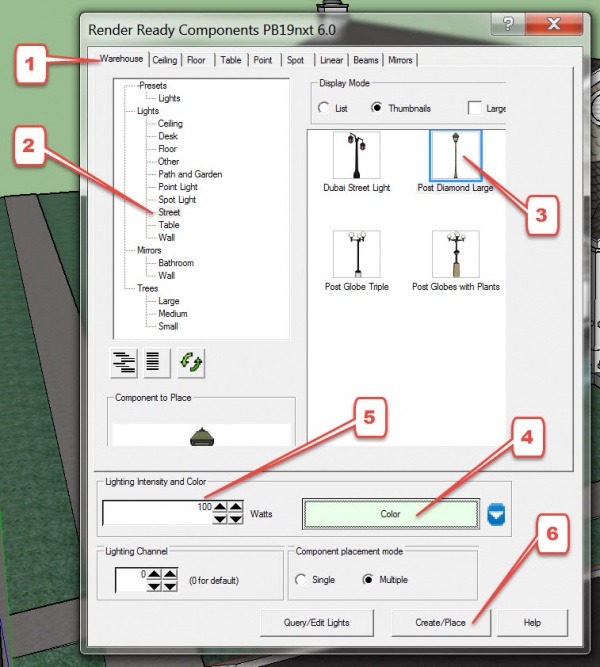
Select
Select a Light and set the options
- Click Warehouse
- Click Street
- Select a Street Light
- Set the lamp color
- Set the lamp intensity
- Click Create/Place
Place
Add one or more street lights to the model
Porch Light
Select and add a Porch Light to the model
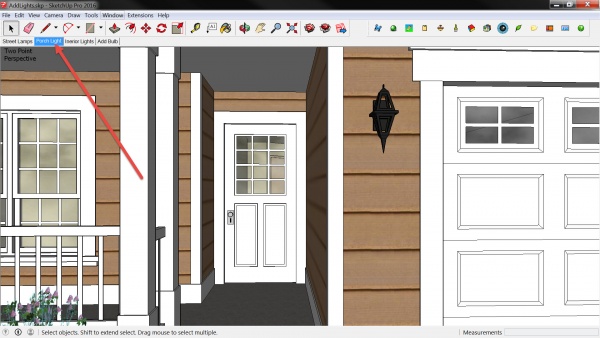
Set the Scene
Use the Porch Light Scene to make it easy to position the light fixture.
Layer Management
The porch light layer attribute for the fixture. Disable display when this light is not needed for the rendering.
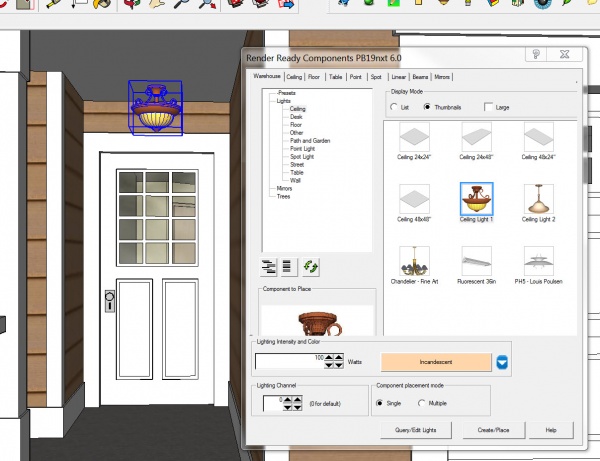
Render Ready Components
Click to open the Render Ready Components dialog to select and place a porch light.
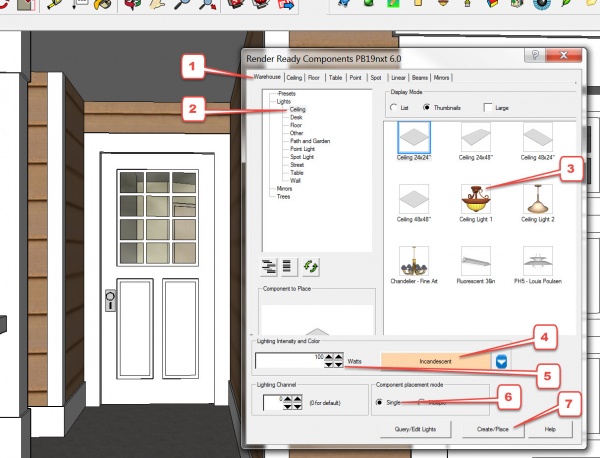
Select
Select a light fixture for the porch and set the options.
- Click Warehouse
- Click Ceiling
- Select a ceiling fixture
- Set the bulb color
- Set the bulb brightness
- Set placement mode to Single
- Click Create/Place
The Porch Light in Place
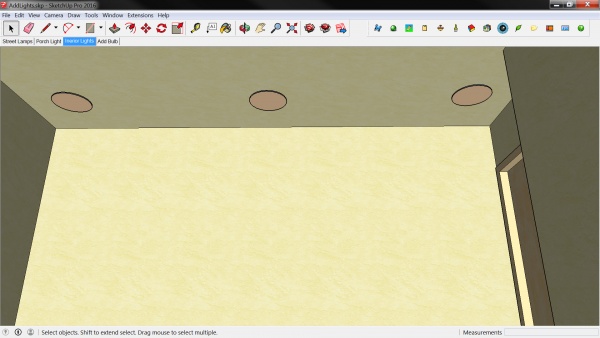
Interior Lights
Select and place ceiling lights in the front bedroom
Set the Scene
Use the Interior Lights scene to place ceiling lights in the front bedroom
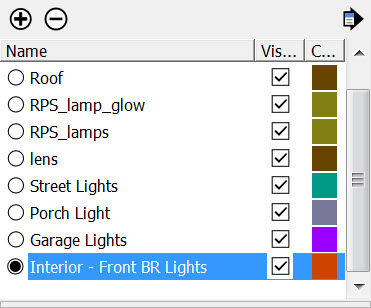
Layer Management
Use the Interior - Front BR Lights layer to manage ceiling lights for this room.
Render Ready Components
Open the Render Ready Components dialog to select and place ceiling lights
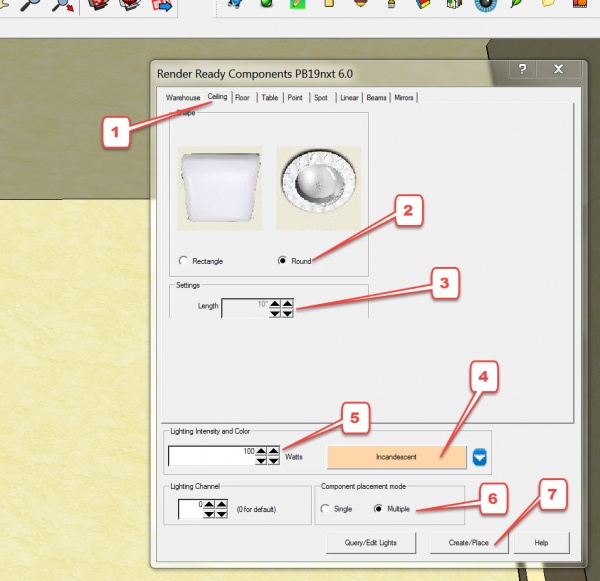
Select
Select, set the options, and place ceiling lights for this bedroom.
- Click Ceiling
- Select Rectangle or Round
- Set size for fixture
- Set bulb color
- Set bulb intensity
- Set Placement Mode
- Click Create/Place
The Ceiling Lights in place
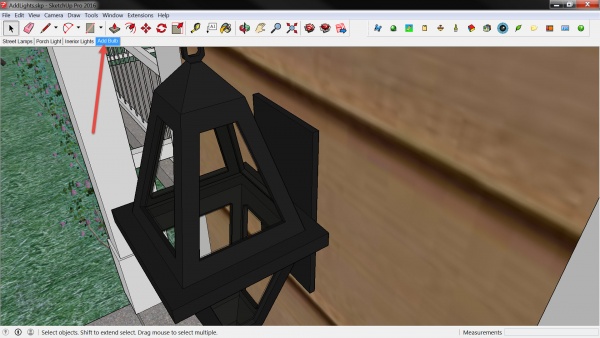
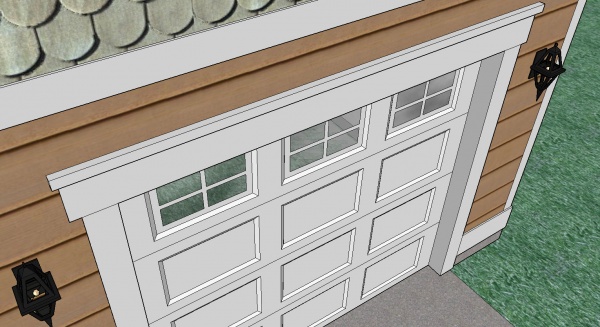
Garage Lights
Some lighting components from the warehouse do not include bulbs. Add bulbs to the garage light components.
Set the Scene
Click Add Bulb Scene
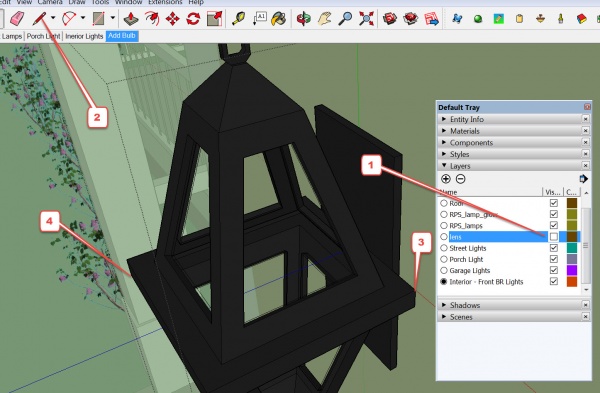
Edit the Component
Right-Click and Select Edit the component

Prepare the component for the bulb
- Turn lens layer OFF
- Select Line tool
- Start line
- End line
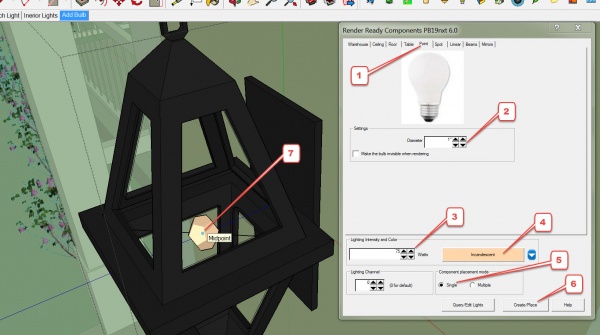
Render Ready Components
Open the Render Ready Components dialog to select a bulb for the garage light components.
Add Bulb
Select the bulb, set the options, and add a bulb to the component.
- Select and Add a Bulb
- Click Point
- Set size for bulb
- Set bulb color
- Set bulb intensity
- Set Placement Mode
- Click Create/Place
- Position bulb at the midpoint of the line
- Don't forget to make the Lens layer visible!
Garage Lights
When you exit Edit Component, you will notice that each garage light instance has a bulb.
Render the Model
You have added lighting and created and modified a component by adding a bulb.
Set View
Rotate your model into a perspective view with the orbit or camera tools
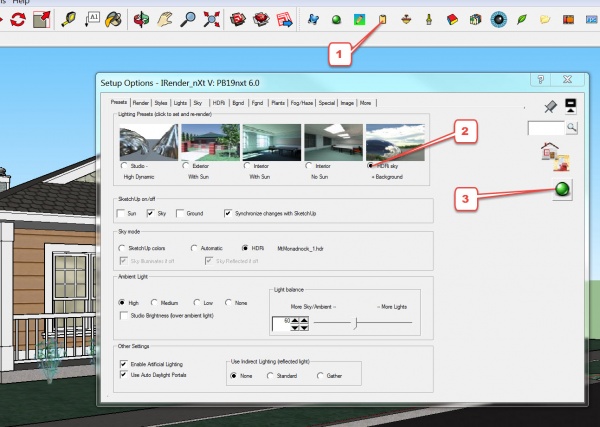
Rendering Options
Use Rendering Options to set the options for your rendering.
- Click Rendering Options
- Presets - select HDRi sky + Background
- Click Render
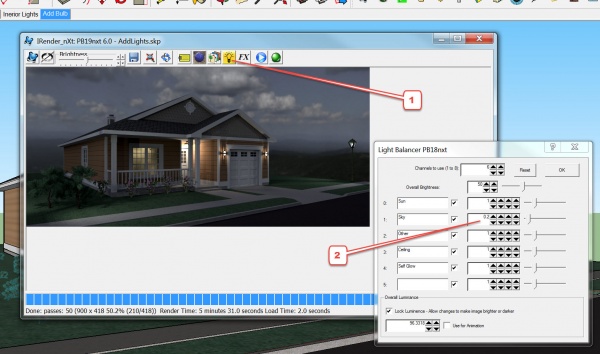
Adjust Lighting
To see the effects of the added lighting, adjust lighting channels with the Light Balancer. This interface can be used while your rendering is processing.
- Open Light Balancer interface
- Lower Sky brightness
Conclusion
Congratulations! You have successfully:
- Added Street Lights
- Added a Porch Light
- Added Ceiling Lights to the front bedroom
- Added a bulb to a warehouse component
- Used Light Balancer to lower HDRi sky brightness
- Completed a rendering of the SketchUp Model