IRender nXt and Photoshop Tutorial
This IRender nXt and Photoshop Tutorial was supplied by Boothy
Contents
- 1 Overview
- 2 Step 1 - Render Image
- 3 Step 2 - Save transparent PNG
- 4 Step 3 - Open PNG file in Photoshop
- 5 Step 4 - Add background
- 6 Step 5 - Identify window frame
- 7 Step 6 - Position image
- 8 Step 7 - Set intensities
- 9 Step 8 - Define reflections
- 10 Step 9 - Position reflections
- 11 Step 10 - Align reflections
- 12 Step 11 - Final Result
- 13 Greater Lighting Control
- 14 Complex Reflections
- 15 Further Resource
- 16 See also
Overview
Getting the background image correct in a visual can make or break the the perceived realism of an image. In IRender nXt you can either apply an image to the whole render or apply an background `texture` to a object in SketchUp and position behind scene to imitate background. Both these methods are sometimes difficult to control in terms of lighting and position and can let down the effort put into the main image.
I have found that by taking advantage of Irender's transparent PNG export filter I can add a more effective, quicker and more controllable image in Photoshop afterwards.
This quick tutorial is not ground breaking - just one of those simple things that makes life easier for a busy designer. This tutorial assumes you have a basic knowledge of Photoshop and SketchUp.
Step 1 - Render Image
Render your image in IRender nXt. In this example I have used the `interior with sun preset` and turned off sky (the interior with sun preset does not look selected because unselecting sky has removed the default values - but is still set to preset) I have also unselected shadow on ground plain in SketchUp. If either of these are selected we will see sky shadow in the window area we wish to leave transparent. I have deleted the `glass` in the window frame prior to render.

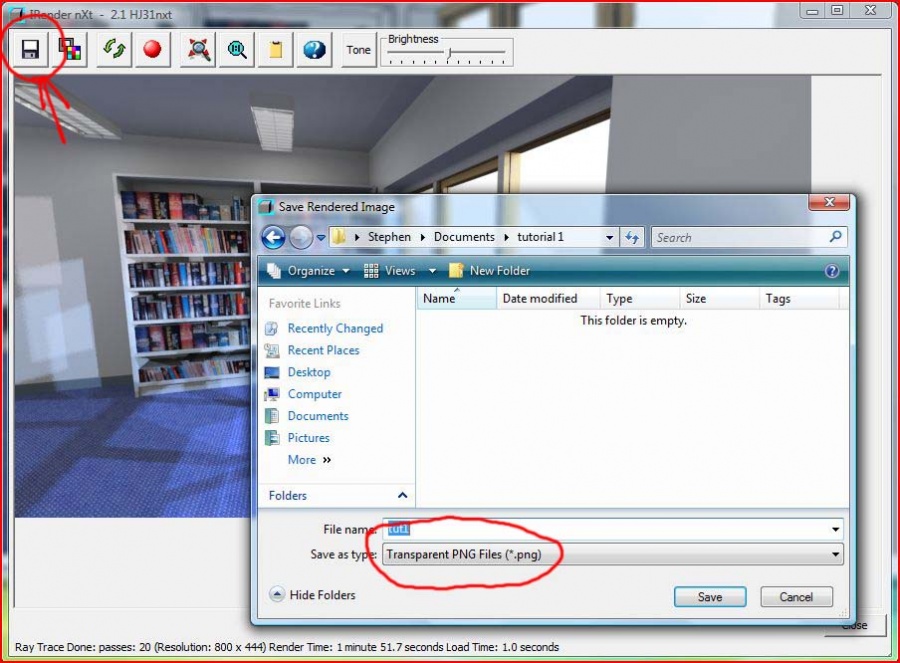
Step 2 - Save transparent PNG
Save image as a transparent PNG file.
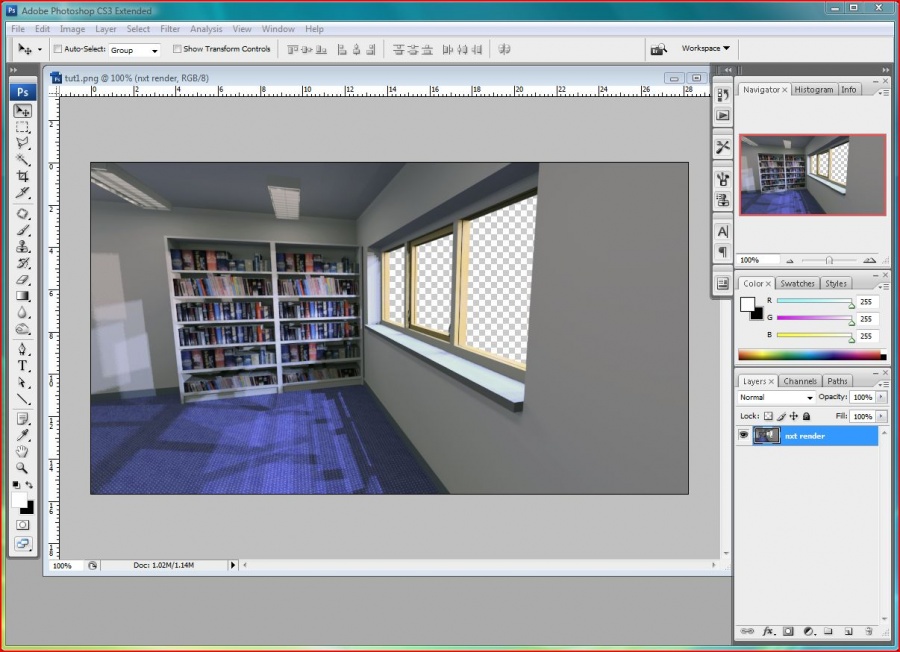
Step 3 - Open PNG file in Photoshop
Open PNG file in Photoshop - it should look like this
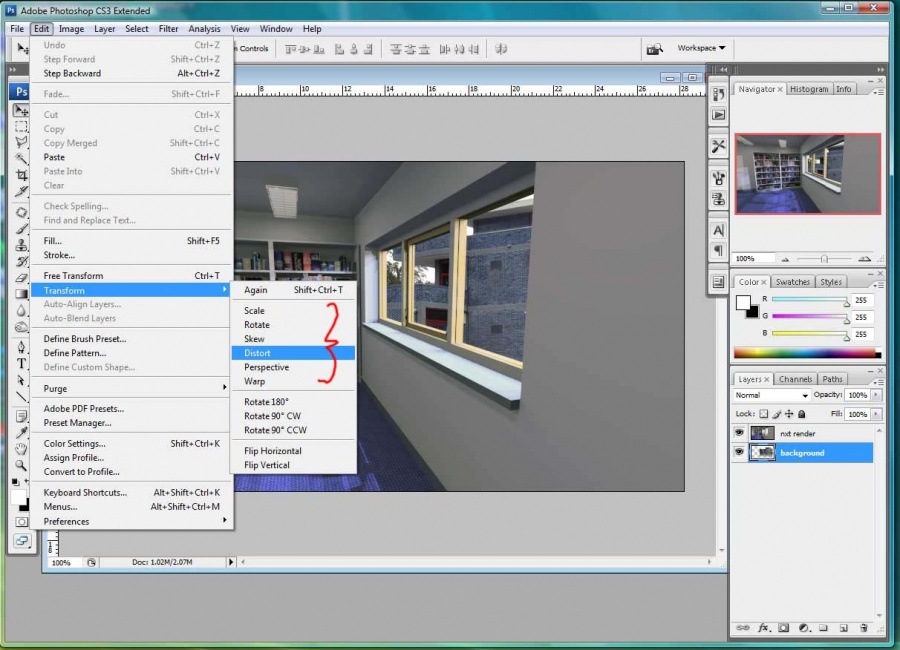
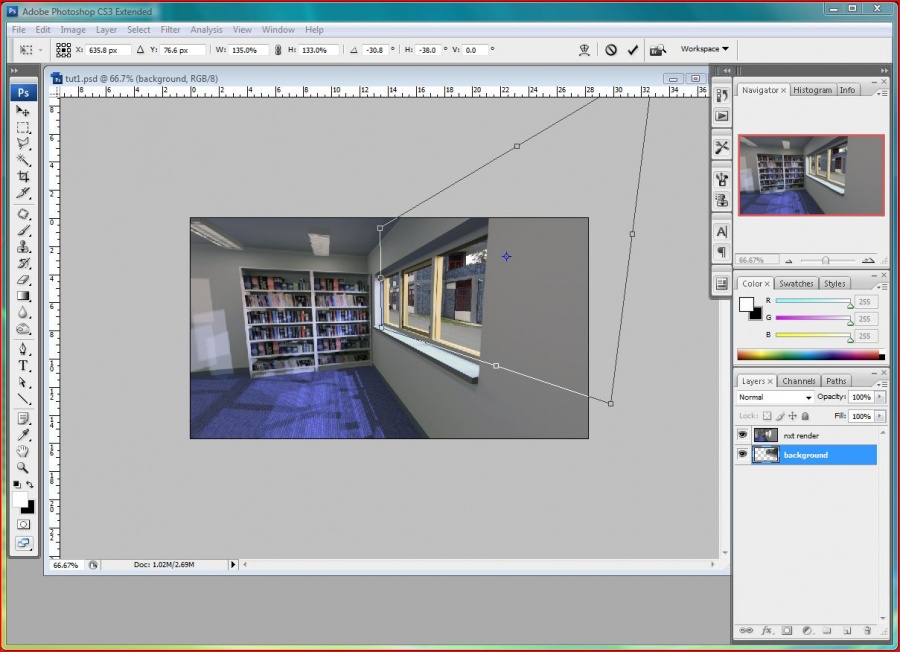
Step 4 - Add background
Open an appropriate background image and paste into the irender file (I use [www.flickr.com www.flickr.com] for a massive free online image resource).In the layers palette drag the background layer behind (below) the render image. Use all the tools available in the transform section to distort the image to the correct scale and perspective .Try and find a image which is near in perspective to your original render - single perspective or elevations are can sometimes give much better results. Do not worry about trying to get perspective perfect - this is after all a background image and is there to enhance\give support to the main image. You can always tweak perspective later.
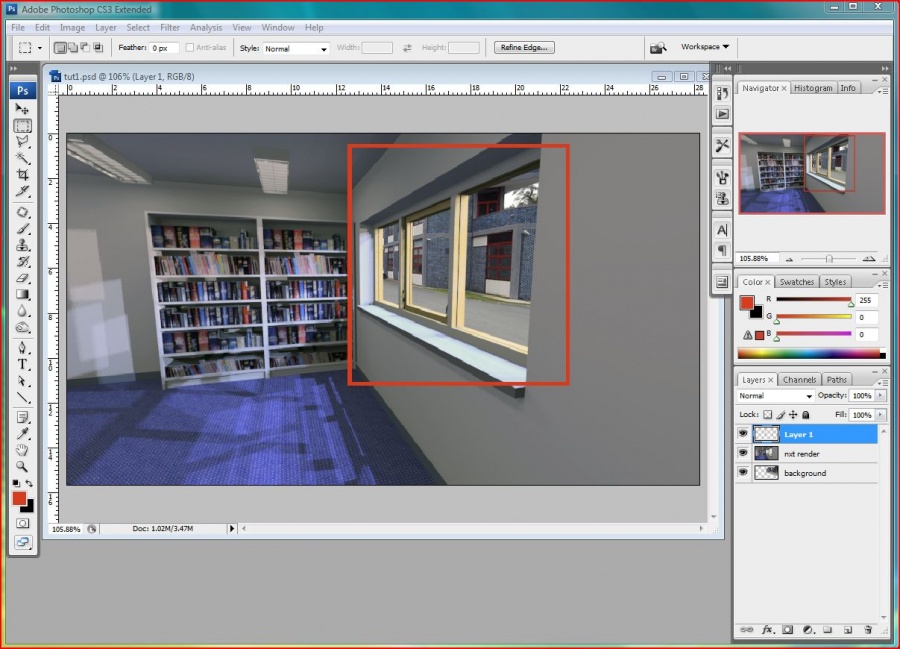
Step 5 - Identify window frame
In the layers palette select the render layer and use the rectangular marquee tool to select an area around window frame (I have used a red border to illustrate marquee area. When selected copy area and paste new layer. Name new layer window frame - in layers palette position window frame layer between render and background layer.
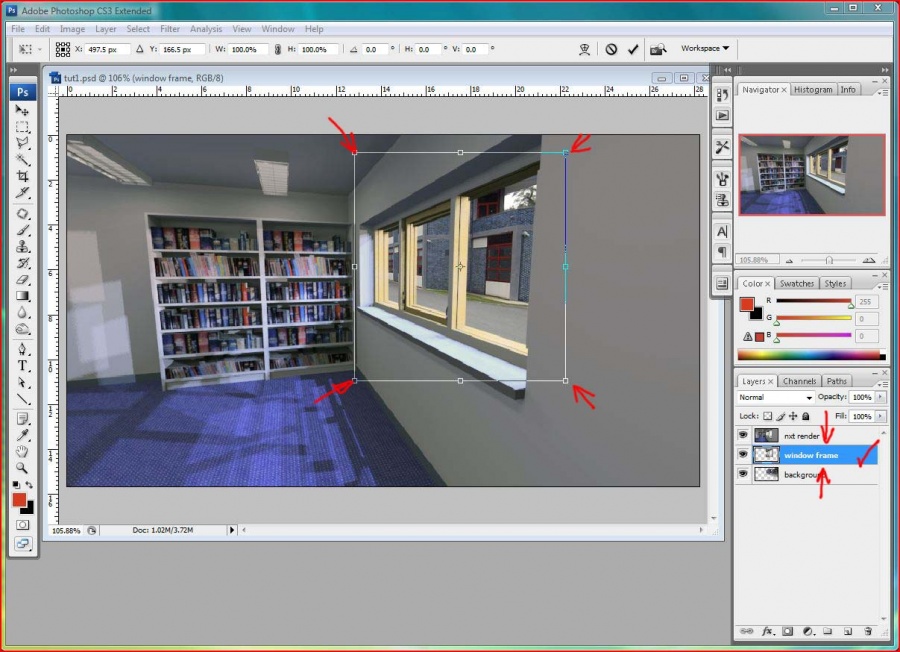
Step 6 - Position image
Go to edit - transform - scale and reduce size of window frame layer and move until you can see the frame - you should attempt to scale and distort image so that it appears to reduce in size with the overall perspective.
Step 7 - Set intensities
Double click on the window frame layer in layer palette to open layer properties dialog - in the general blending section - change from normal to hardlight (this will give a crisper effect to eventual reflection) and reduce opacity to approx 70% - I would normally give more subtlety to reflection and reduce opacity further.

Step 8 - Define reflections
Reselect the render layer and use a marquee tool to select a area of interior which will eventually make our reflections in the window. Copy this area and paste new layer into image.

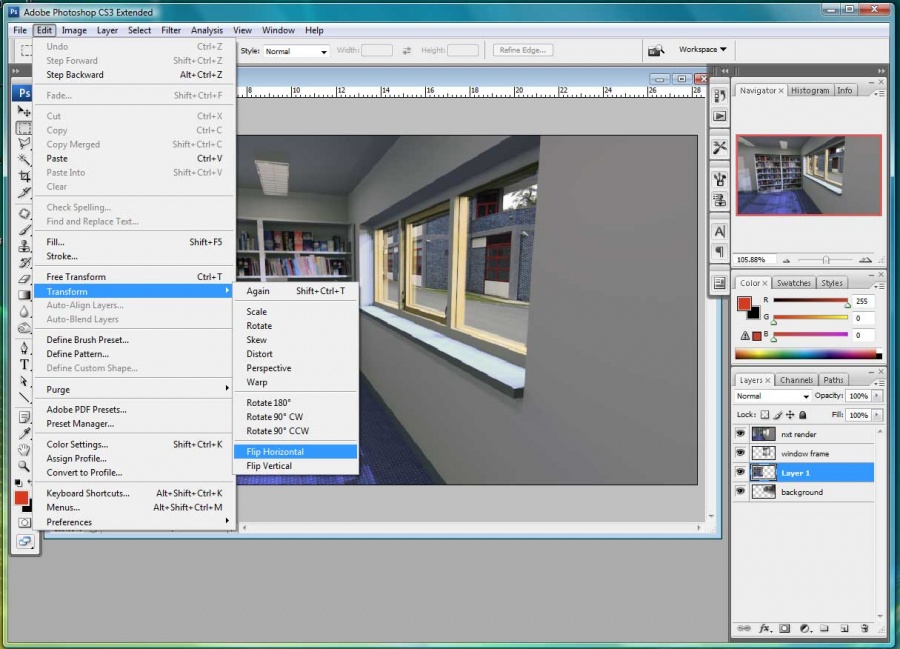
Step 9 - Position reflections
In layer palette place new `reflection layer`between window frame layer and background image. In edit - transform flip layer horizontally and move in front of window.
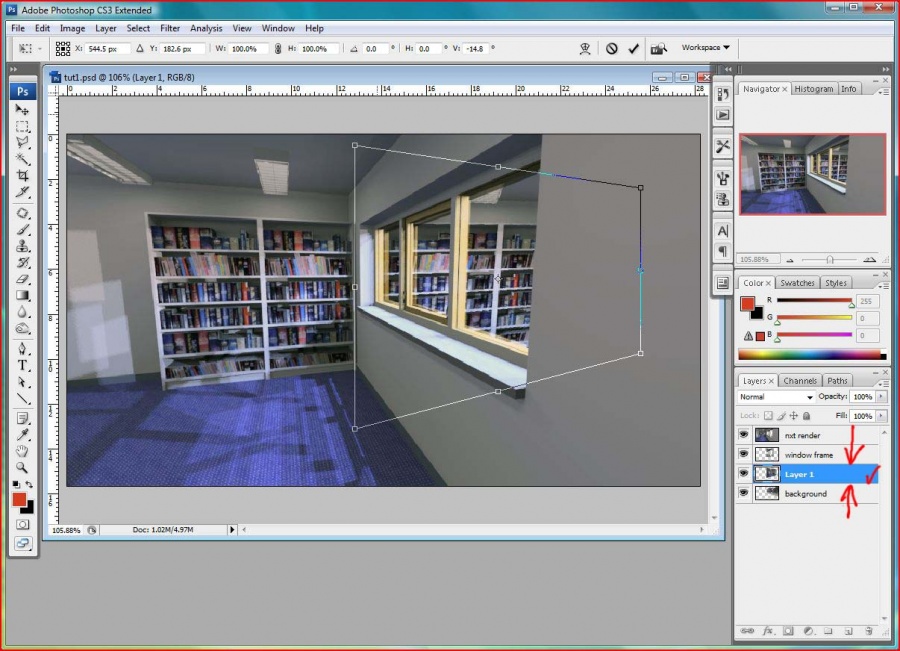
Step 10 - Align reflections
Similar to background layer - distort image to match overall perspective.
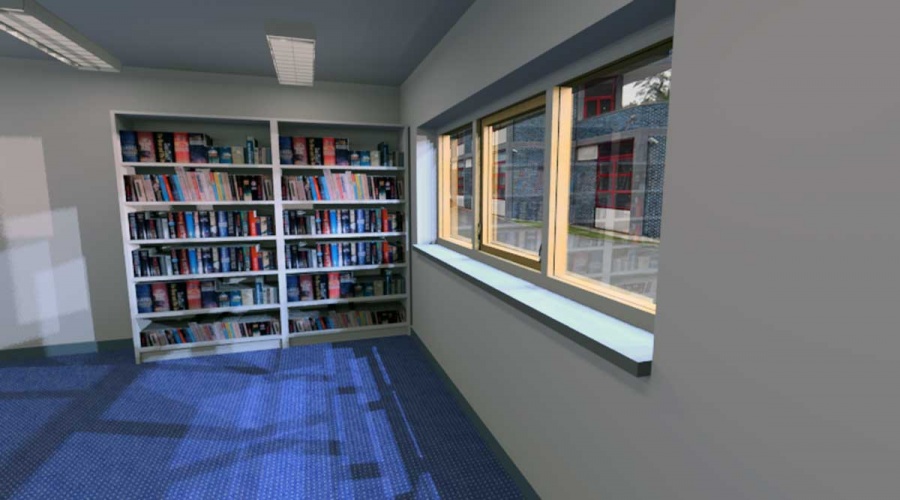
Step 11 - Final Result
Double click on layer in layer palette and change general blending settings to hardlight - alternatively experiment with the other blending modes - softlight and overlay will give you a softer reflection. In this case I have reduced opacity to 20% - adjust to suit mood of image.
Viola - crisp quick and easy background!
By simply providing the `reflection` you will give a suggestion of glass and transparency and give much greater depth to the image. The presence of the reflection is much more important than the content - a view from a completely different room will still give a sense of depth and at such reduced opacity will probably never be noticed by your client ! - you may want to have some fun with that - all in the `best possible taste` of course.
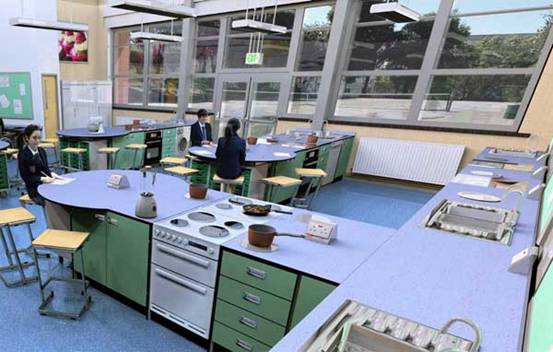
Greater Lighting Control
Another advantage of the technique if you use a solid `glass panel` saving has Jpeg and then deleting panels in Photoshop - you will have much greater control in your external lighting in SketchUp which in complex models makes life much easier. See the the sample below
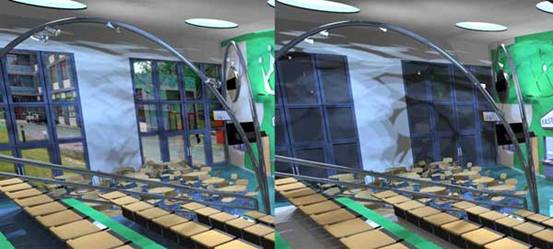
Complex Reflections
If you require a complex reflection - do not try to distort all in one layer - sometimes you will never get a realistic mirrored reflection without a mirrored render of the other side of the room - the secret is to break up reflection image into several layer and distort individually. The example below as a total of 18 layers making up the background image.
Further Resource
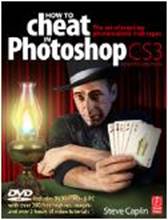
In my opinion - there is only one book you need to read to enhance your photo montage skills and its called `How to cheat in Photoshop`by Steve Caplin (there is a new version for CS4 published in January 2009)
He is the man responsible for the easy reflection ideas above.
I have read this book from cover to cover twice and have done all the tutorials - its mega! - Visit the web site at link below - there are some sample pages of the book on the web site - the book is sold internationally
I hope this tutorial speeds thing up
Boothy