Alpha Channel
An Alpha Channel represents information added to a raster image to indicate where it is transparent.
The RpTools Alpha Channel wizard makes it easy to add an alpha channel to an existing raster image (saved on disk), by indicating a color in the existing image which is supposed to be transparent. Many paint programs also make it easy to add alpha channels. However, Windows Paint, and several other paint program do not have this capability.
Contents
Example
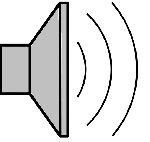
The image on the right is an raster image of a speaker with arcs to represent the sound.
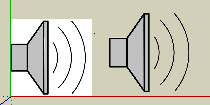
The second image show two versions of this raster image imported into SketchUp. The first version is imported normally, and the white in the image appears as white in SketchUp. The second version was imported from an alpha channel image where the white was declared to be transparent. Notice that in the second image, the area that was white is now transparent when loaded into SketchUp.
Usage
- Select alpha channel icon in RpTools. (
 )
) - Select a raster image from the disk. (Note: The new image will have the same name and location as the selected image, with _alpha.png added to the name. If you are executing the wizard a second time, do not select the _alpha.png version.)
- Select a color in the image to be made transparent.
- Select a display color to view the alpha channel.
- If there are artifacts where the color did not work properly, try raising or lowering the tolerance.
- If there are identical colors in the image which you do not want to be transparent, alter the image with a paint program and resave it. Click 'Reload' to reload it if you modify it in an external editor.
- select the desired function
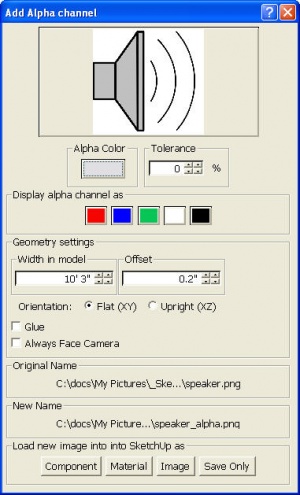
Alpha settings
- Alpha Color - this color will be converted to the alpha channel. You can select a point in the image to define the Alpha Color.
- Tolerance - other colors within this percentage of the Alpha Channel will also be made transparent.
- Display alpha channel as - will show the alpha channel in this color in the sample display.
Geometry Settings
- Width in Model - size in model units for material or component.
- Offset - Image in a component is raised this much so it will not interfere with other geometry at the same position. (For instance if you glue the image component to a wall which already has a texture.)
- Orientation - Flat on the ground, or upright.
- Glue - when making a component, will set it to glue to other faces.
- Always Face Camera - when making a component, will set it to always face the camera.
Load new image into SketchUp as
- Component - places the image in a component and loads the component.
- Material - loads the transparent image into SketchUp as a material. The material placement window SketchUp material placement window will be loaded. You will need to select Model in the Materials window (
 ), select the new material, and place it on a face.
 - Image - loads the transparent image into SketchUp as an Image
- Save Only - the new raster image will be saved to disk.
Display Quality
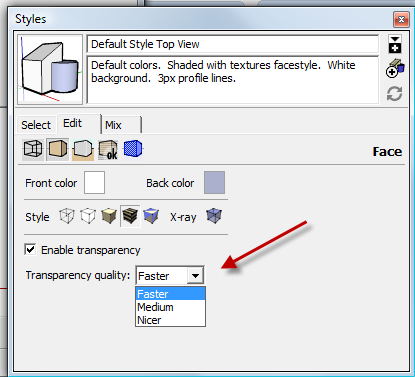
Note: If your alpha transparent images do not display well in SketchUp, you can adjust the quality (vs speed) of Alpha Image display.